Common-size deck project
12×16 Deck Materials & Cost Calculator
A 12×16 deck has 192 sq ft of finished surface area. Start with this common size to estimate decking, joists, fasteners, preliminary footings, concrete and project cost, then change any dimension or assumption to match your build.
463 linear ftdecking to buy
We prefilled 16-in joist spacing, 8-ft maximum post spacing along preliminary beam lines, 12-in × 36-in preliminary footings, 16-ft purchase boards and 10% decking waste for planning. For attached decks, the planning takeoff uses the verified house ledger plus one exterior beam line; freestanding decks use independent support lines. These are not structural requirements; verify joist and beam spans, footings, ledger attachment and connections for your actual deck. You can change any assumption under Customize.
MATERIAL ESTIMATE
What you'll need
The main planning quantities, already filled in from your project choices.
463 linear ftDecking
10Joists
771Surface fasteners
9Preliminary footings
23.3 ft³Footing concrete
Framing, attachment and footing quantities are planning estimates, not structural design. Verify spans, loads, member sizes, ledger attachment, connectors, soil conditions and local code before building.
OPTIONAL — CUSTOMIZEChange PlanDIYBuild's recommended assumptions+
Only change these if you already know the product or construction details you want to use.
View full calculation details
Deck area192 ft²
Deck configurationFreestanding
Deck board rows35
Decking to buy463 linear ft
16-ft deck boards to buy29
Joists10
Joist lumber160 linear ft
Rim board lumber56 linear ft
16-ft rim boards to buy4
Beam lines3
Beam lumber72 linear ft
16-ft beam members to buy5
Posts to buy9
Post lumber72 linear ft
Post bases9
Post caps9
Surface fasteners771
Preliminary footing grid3 × 3
Preliminary footings9
Footing concrete23.3 ft³
80-lb concrete bags39 bags
60-lb concrete bags52 bags
Where these assumptions come from
Manufacturer and industry estimating values are separated from PlanDIYBuild planning allowances.
PROJECT TAKEOFF
What you'll need
Key purchase quantities from the same complete BOM used below.
3980-lb concrete bags
5Beam members16-ft purchase length; structural member size/grade must match the approved deck design
29Deck boardsPressure-treated wood · 5.5-in actual width × 16-ft purchase length
9Deck posts
10Joists
4Rim boards16-ft purchase length; structural member size/grade must match the approved deck design
771Deck surface fasteners
9Post bases
The preview and copied list come from the shared BOM. Planning estimate — verify product sizes, structural requirements and local conditions before purchasing.
PURCHASE PLAN
Materials & tools
Your project quantities with practical planning prices.
Materials to buy
39 80-lb concrete bagsConcrete$253.50$6.50 / bag · estimated planning price
5 Beam membersDeck · 16-ft purchase length; structural member size/grade must match the approved deck design$150.00$30.00 / board · estimated planning price
29 Deck boardsDeck · Pressure-treated wood · 5.5-in actual width × 16-ft purchase length$493.00$17.00 / board · estimated planning price
9 Deck postsDeck$270.00$30.00 / post · estimated planning price
10 JoistsDeck$170.00$17.00 / joist · estimated planning price
4 Rim boardsDeck · 16-ft purchase length; structural member size/grade must match the approved deck design$96.00$24.00 / board · estimated planning price
771 Deck surface fastenersDeck hardware$69.39$0.09 / fastener · estimated planning price
9 Post basesDeck hardware$198.00$22.00 / connector · estimated planning price
9 Post capsDeck hardware$180.00$20.00 / connector · estimated planning price
Tool & supply plan
Required / common
✓Tape measureLayout · estimated $12.00 purchase cost
✓Chalk lineLayout · estimated $15.00 purchase cost
✓Circular sawCutting · estimated $90.00 purchase cost
✓Drill / impact driverFastening · estimated $120.00 purchase cost
✓Framing squareLayout · estimated $12.00 purchase cost
✓4-ft levelLayout · estimated $35.00 purchase cost
✓Socket / wrench setConnections · estimated $45.00 purchase cost
✓ShovelFootings · estimated $28.00 purchase cost
Specialty / rent or buy
✓Post-hole digger or augerFootings · estimated $75.00 rental cost
✓Concrete mixing tub or mixerFootings · estimated $65.00 rental cost
Consumables / safety
✓Safety glassesPPE · estimated $12.00 purchase cost
✓Hearing protectionPPE · estimated $20.00 purchase cost
✓Work glovesPPE · estimated $15.00 purchase cost
Estimated specialty rentals: $140.00
Estimated consumables / PPE: $47.00
Incremental project spend: $187.00
Common tools if starting from scratch: $357.00
Buy every tool / supply from scratch: $974.00
Tool prices are planning estimates. Confirm current prices, the exact installation method, manufacturer instructions and safety requirements before purchasing or renting.
Completeness check: The calculator distinguishes freestanding from attached decks and can add ledger boards, flashing, hangers and user-spaced ledger fasteners. Structural sizing, spans, loads, footing design, railing and stairs still require an approved project design.
Pricing: material subtotal $1,879.89 + tools / rentals $187.00. Project total $2,330.07 uses PlanDIYBuild planning prices. Actual retailer prices vary by product, store and location.
YOUR BUILD PLAN
Your deck plan is ready.
You can build this. You answered the project questions; PlanDIYBuild handled the quantities, shopping plan, tools and build roadmap.
DECK LAYOUT PLANNED
Your dimensions and deck choices drive the calculated plan.
MATERIALS CALCULATED
Purchase quantities, waste and planning costs are prepared.
TOOLS & SUPPLIES IDENTIFIED
Common tools, consumables and specialty rentals are included in the plan.
STEP-BY-STEP BUILD PLAN READY
Your 12-step deck roadmap uses the same calculated project.
WE'LL HELP WITH THESE ALONG THE WAY
No homework before you start planning.
Some details depend on your site or the exact product you buy. We'll surface them in the build steps when they matter.
Local footing and permit details
When you reach layout and footings, PlanDIYBuild will show you what local details matter and where to confirm them.
The exact decking you buy
Board spacing and fasteners vary by product. Bring the product instructions back to the build step and follow those exact requirements.
ESTIMATED PROJECT COST
Open full budget in MyBuild →$1,398–$3,262
Likely project range · 50% estimate confidence
Materials$1,880
Labor$0
Tools / rentals$187
Project total$2,330
Materials use PlanDIYBuild U.S. planning estimates. Retailer prices vary by product, store and location. Tools / rentals are planning estimates.
Cost assumptions & priced materials
39 × $6.50 — 80-lb concrete bags · Estimated planning price · US regional fallback$254
5 × $30.00 — Beam members · 16-ft purchase length; structural member size/grade must match the approved deck design · Estimated planning price · US regional fallback$150
29 × $17.00 — Deck boards · Pressure-treated wood · 5.5-in actual width × 16-ft purchase length · Estimated planning price · US regional fallback$493
9 × $30.00 — Deck posts · Estimated planning price · US regional fallback$270
10 × $17.00 — Joists · Estimated planning price · US regional fallback$170
4 × $24.00 — Rim boards · 16-ft purchase length; structural member size/grade must match the approved deck design · Estimated planning price · US regional fallback$96
771 × $0.09 — Deck surface fasteners · Estimated planning price · US regional fallback$69
9 × $22.00 — Post bases · Estimated planning price · US regional fallback$198
9 × $20.00 — Post caps · Estimated planning price · US regional fallback$180
Estimated specialty rentals$140
Estimated consumables / PPE$47
Common tools if not already owned$357
Tool amounts are broad planning allowances, not current retailer or rental quotes. The incremental project-spend allowance assumes common tools are already owned and adds specialty rentals plus consumables / PPE. Reusable tools and rentals are shared across a combined saved-project budget when the same tool appears more than once; consumables / PPE remain budgeted per project. Buy-all totals use purchase allowances for every tool rather than rental allowances. Actual availability, tax, delivery, site conditions and labor may differ.
BUILD YOUR DECK
Your project, from layout to finished deck.
The same choices that created your takeoff drive this construction roadmap, so your dimensions, quantities and construction assumptions follow you through the build.
BEFORE YOU START
Permit / codeConfirm permits, setbacks, structural, guard and stair requirements locally.
811Have underground utilities marked before excavation.
DifficultyAdvanced DIY / structural project
Estimated time22–52 hours + concrete cure
Recommended crew2 people; 3 for heavy beam placement
SafetyEye/hearing protection, gloves, safe lifting and temporary bracing.
Verify before you buildDeck framing and foundations are structural work. Use this as a project roadmap, not a stamped structural design. Confirm permits, utilities, spans, loads, connections, footing requirements and local code before construction.
YOUR CALCULATED PLANDimensions, quantities, footing grid and joist spacing come from your calculator inputs and takeoff.
VERIFY FOR YOUR LOCATIONPermits, frost depth, soil, spans, loads, guards, stairs and structural connections require local or design verification.
FOLLOW PRODUCT INSTRUCTIONSConcrete cure, connector fasteners, decking gaps, edge distances and finishes follow the selected manufacturer.
YOUR DECK PLAN
Freestanding · 10 joists @ 16" O.C. · 9 footings12 × 16 ft construction map
This construction map deliberately keeps the framing visible. Footing/post centers, beam lines and joists stay readable; decking runs perpendicular to the joists. Structural sizes, spans and connections remain verification items before construction.
YOUR BUILD ROADMAP
0 of 12 steps complete · Next: Plan & mark the deck
STEP 01
Plan & mark the deck
BUILDVIEWSee each stage before you build it
STEP 01 / 12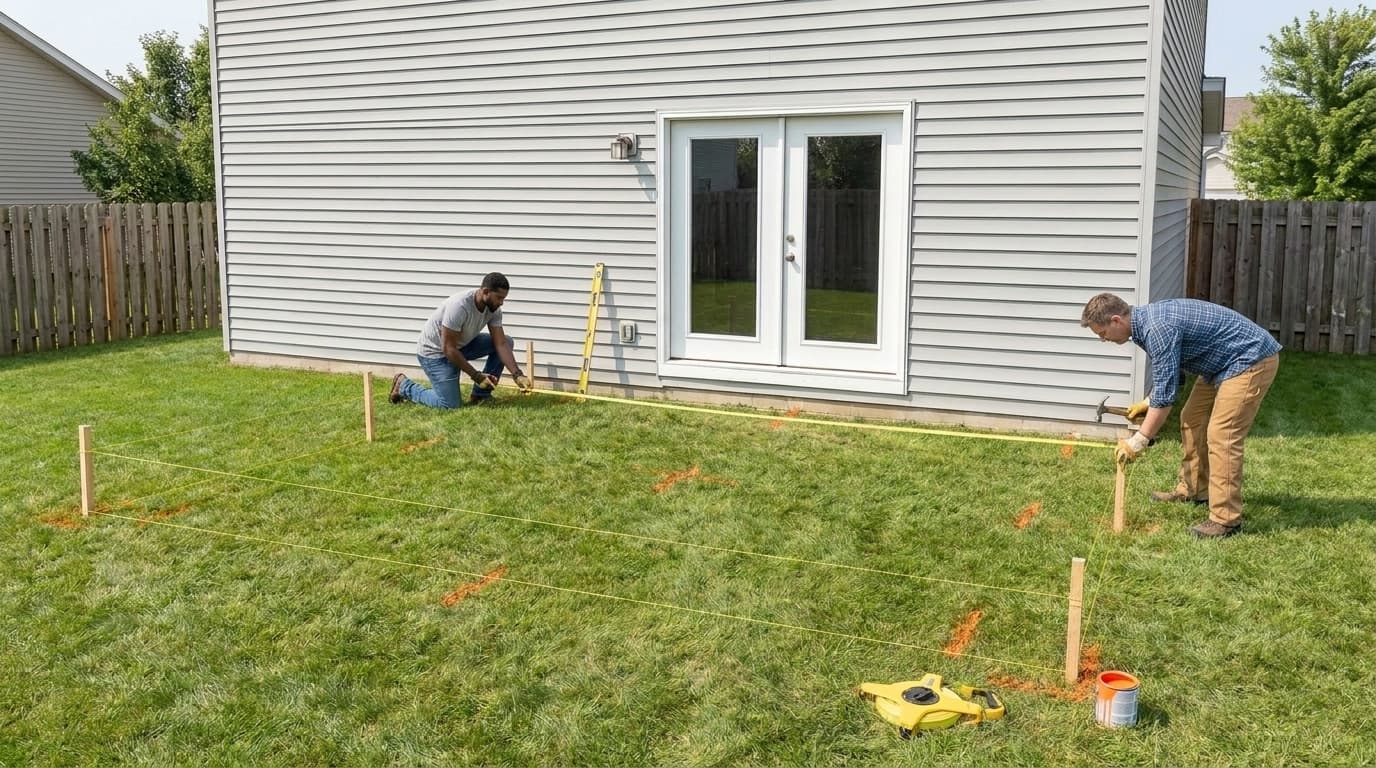
12 × 16 ft
WHAT TO DO
Confirm and mark the 12 × 16 ft footprint, drainage, access and finished height. For this freestanding deck, lay out the complete supporting footprint independently of the house.
FOR YOUR DECK
Confirm permits, setbacks, 811 utility marking, frost depth, soil conditions, framing spans and locally required footing details before construction.
CHECK BEFORE CONTINUING
✓Utilities are marked
✓Permit / setback requirements checked
✓Finished deck location and height confirmed
STEP 02
Lay out the footings
BUILDVIEWSee each stage before you build it
STEP 02 / 12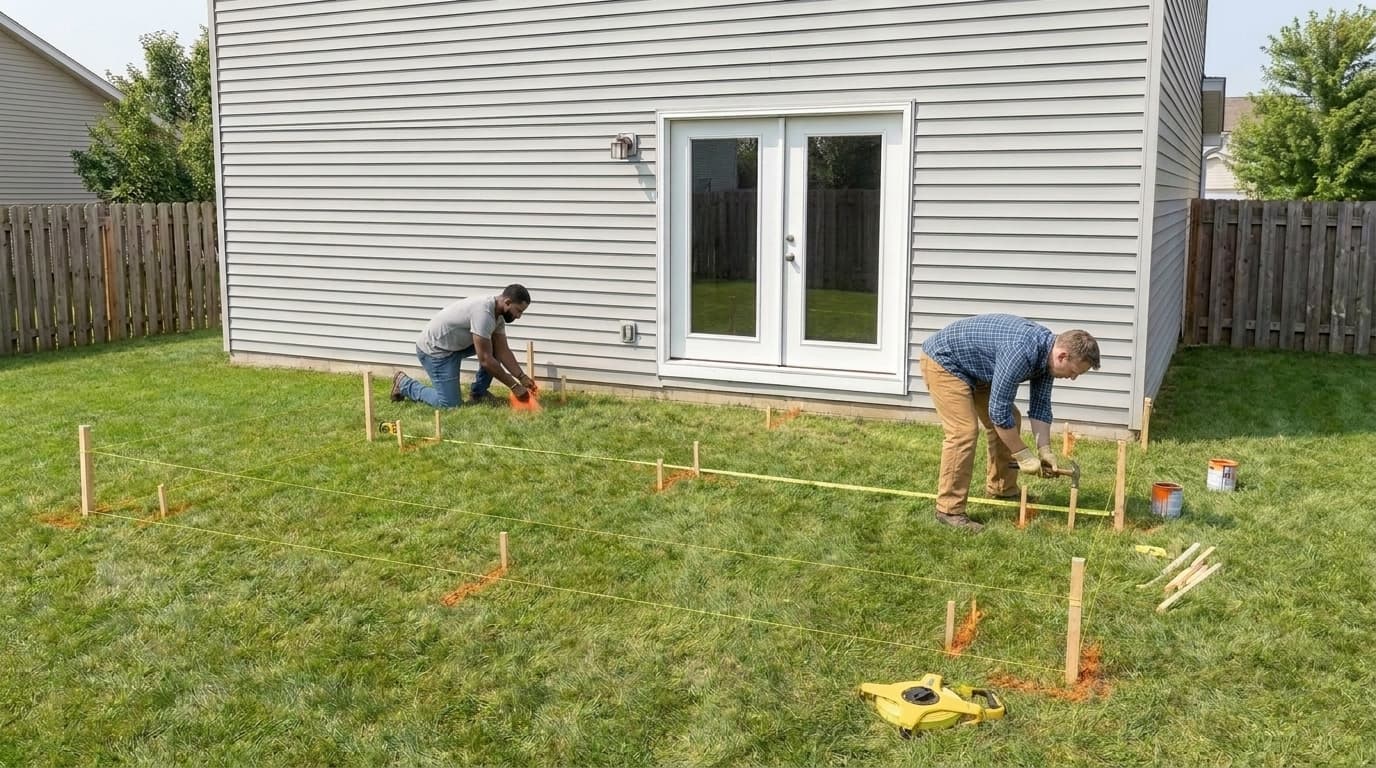
12 × 16 ft
WHAT TO DO
Use A1 on your diagram as the reference corner. Set batter boards or stable stakes, run mason lines, square the perimeter, then transfer every labeled footing center from the plan.
FOR YOUR DECK
Your 12 × 16 ft deck has a preliminary 3 × 3 layout with 9. Both overall diagonals should measure about 20.00 ft when the rectangle is square.
CHECK BEFORE CONTINUING
✓Overall length = 12 ft
✓Overall width = 16 ft
✓Both diagonals ≈ 20.00 ft
✓9 footing centers marked
✓Utilities marked before digging
STEP 03
Dig all footing holes
BUILDVIEWSee each stage before you build it
STEP 03 / 12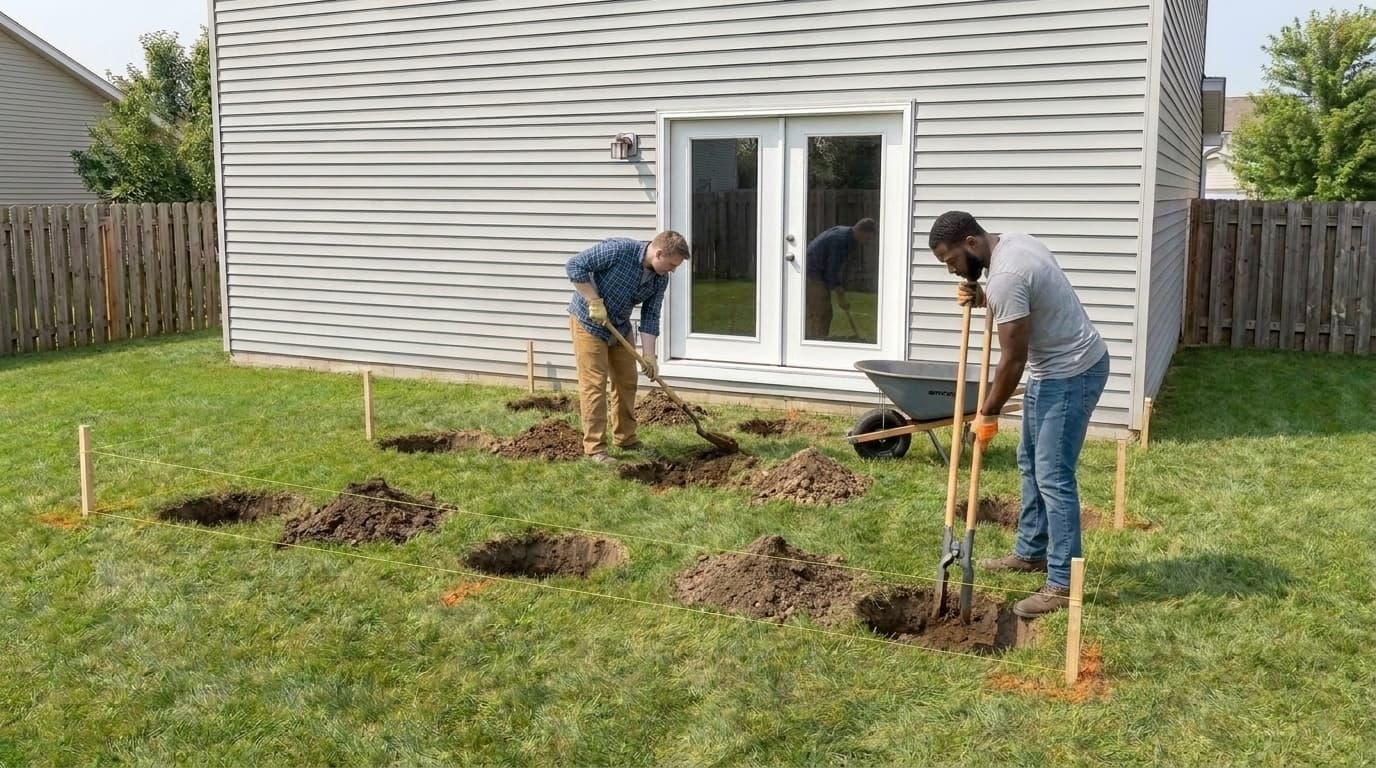
12 × 16 ft
WHAT TO DO
Excavate every verified footing location before beginning any concrete placement, keeping each hole centered beneath the layout lines. Prepare forms or bases required by the approved detail, expose firm undisturbed bearing soil and remove loose soil from the bottoms. Keep the full footing layout visible so all hole locations, depths and dimensions can be checked together before the pour.
FOR YOUR DECK
Dig 9 using the current planning assumption of approximately 12 in. diameter × 36 in. deep. Frost depth, soil and local code can require different dimensions.
CHECK BEFORE CONTINUING
✓9 holes fully excavated and centered on layout marks
✓Every required hole completed before concrete placement
✓Required depth / bearing conditions confirmed locally
✓Loose soil removed from bottoms
STEP 04
Inspect, pour footings & install anchors
BUILDVIEWSee each stage before you build it
STEP 04 / 12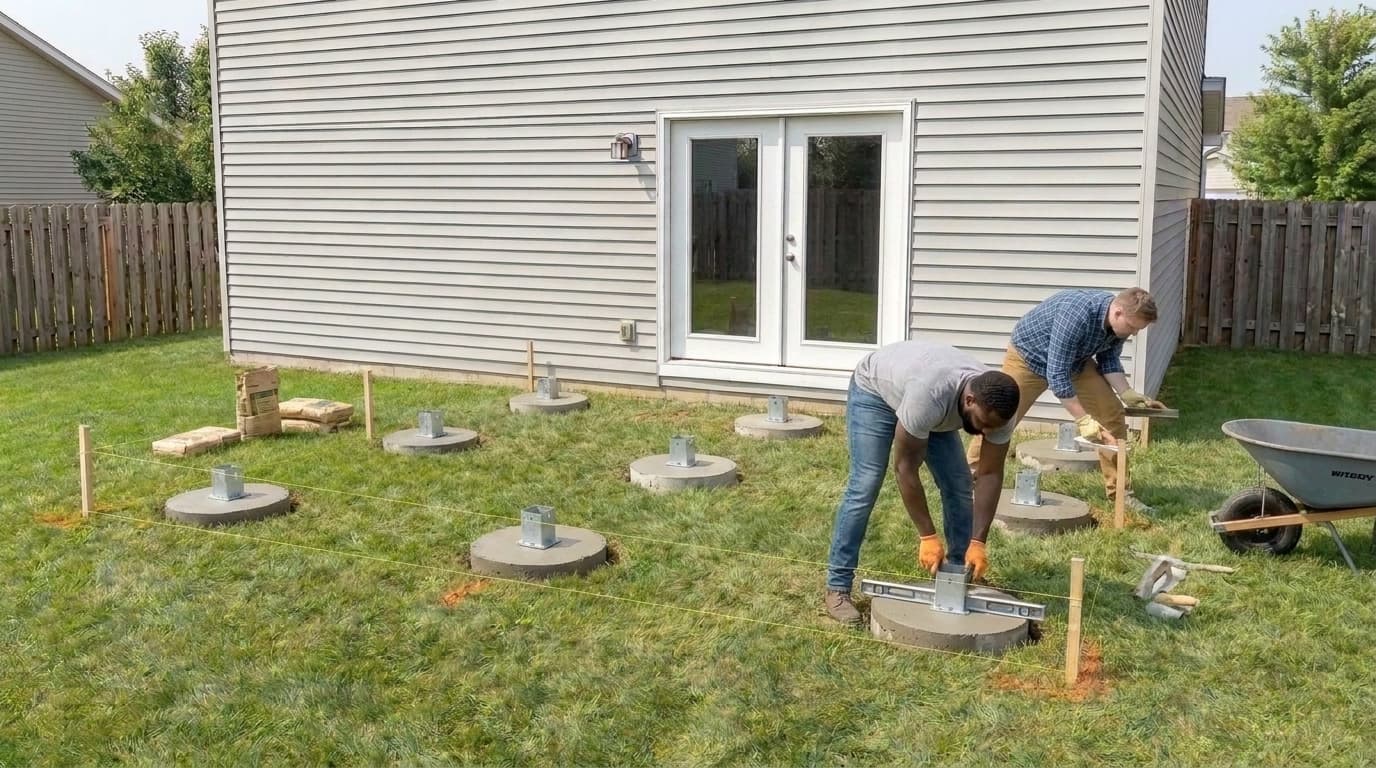
12 × 16 ft
WHAT TO DO
Before placing concrete, verify every footing hole is complete and obtain any required footing / excavation inspection. Recheck hole locations, dimensions, bearing conditions, forms and reinforcement required by the approved detail. Then mix and place concrete according to the manufacturer instructions. Consolidate and finish the top, then accurately position approved anchors or post bases. Allow the concrete to cure before loading it.
FOR YOUR DECK
Calculated footing concrete: 23.3 ft³. Planning purchase quantity: 39 bags. Recalculate if the verified footing dimensions change.
CHECK BEFORE CONTINUING
✓Required footing / hole inspection completed before concrete where applicable
✓Post bases / anchors aligned to plan
✓Anchor elevations consistent
✓Concrete cured before loading
STEP 05
Install posts
BUILDVIEWSee each stage before you build it
STEP 05 / 12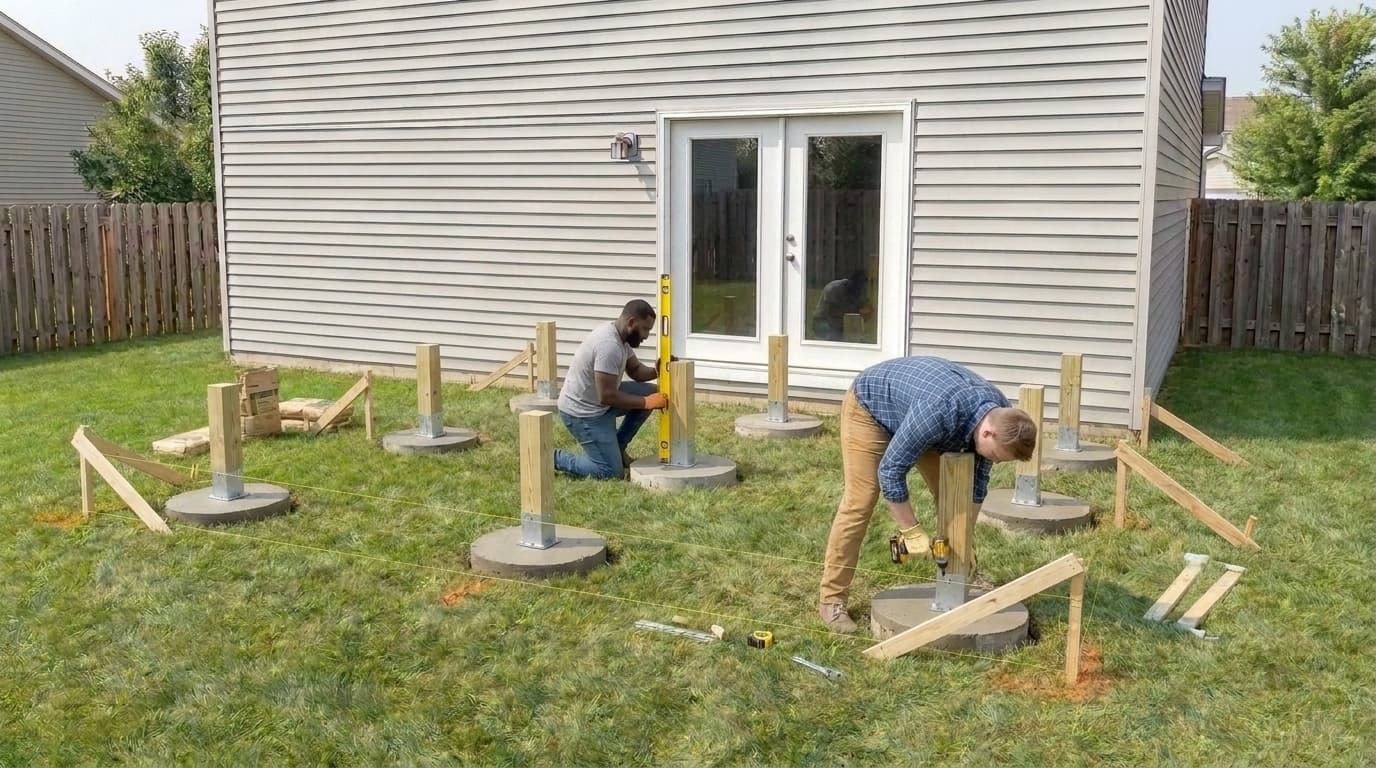
12 × 16 ft
WHAT TO DO
Set posts in the cured post bases, plumb them in both directions and temporarily brace them. Establish consistent reference elevations before final cuts or loading the supports.
FOR YOUR DECK
Your takeoff calls for 9. Verify post size, height, base hardware and bracing against the approved structural plan.
CHECK BEFORE CONTINUING
✓9 posts accounted for
✓Every post plumb in both directions
✓Post elevations established
✓Temporary bracing secure
STEP 06
Install beams
BUILDVIEWSee each stage before you build it
STEP 06 / 12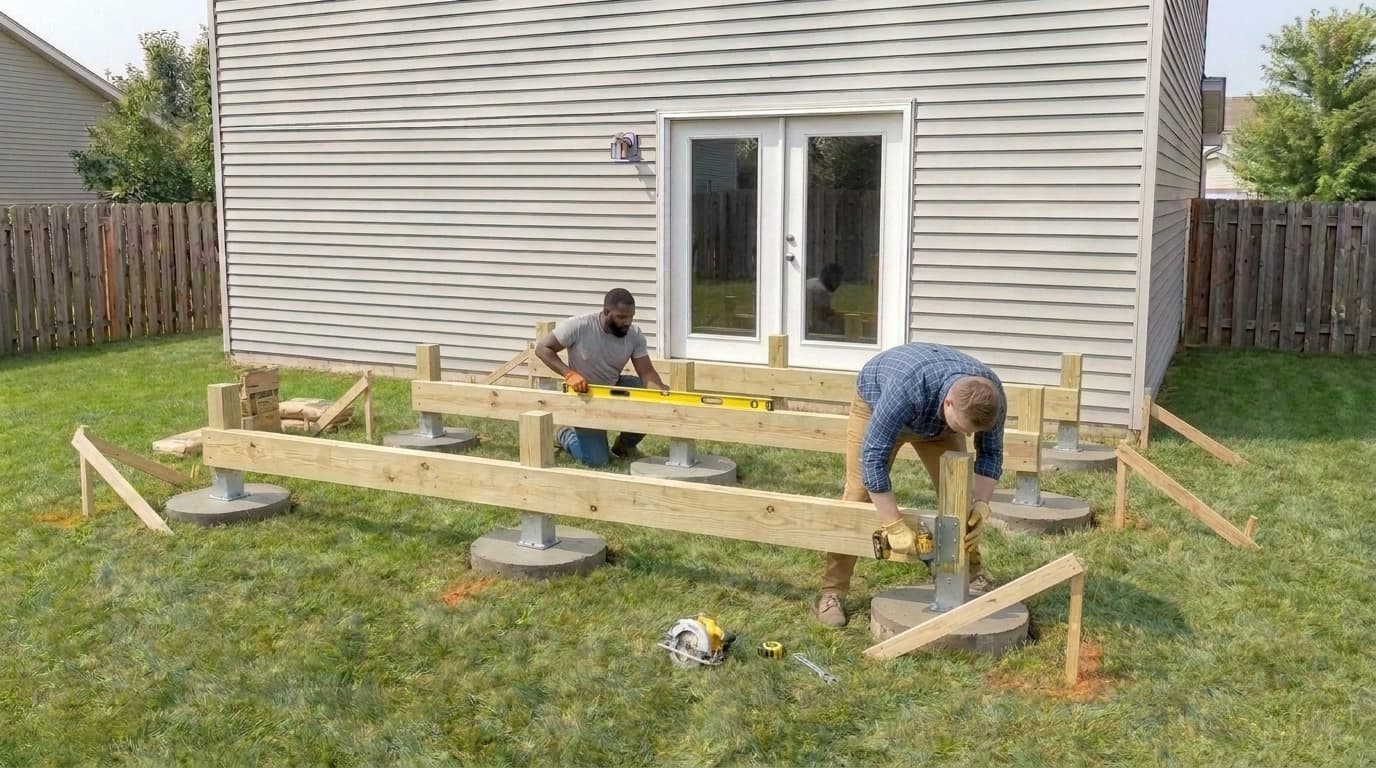
12 × 16 ft
WHAT TO DO
Assemble and install beam members at the verified elevation using approved post-to-beam connections. Provide the required direct bearing at posts, restrain beams against lateral movement, and keep splices only over approved bearing locations. Keep the beam straight and level before final fastening.
FOR YOUR DECK
Your takeoff includes about 72 linear ft of beam material. Verify beam plies, lumber species/grade, spans, splices and connectors for the actual design and loads.
CHECK BEFORE CONTINUING
✓Beam size / plies structurally verified
✓Required beam bearing verified
✓Beam lines straight and at planned elevation
✓Splices located over approved bearing
✓Post-to-beam connectors / lateral restraint complete
STEP 07
Build & square the outer frame
BUILDVIEWSee each stage before you build it
STEP 07 / 12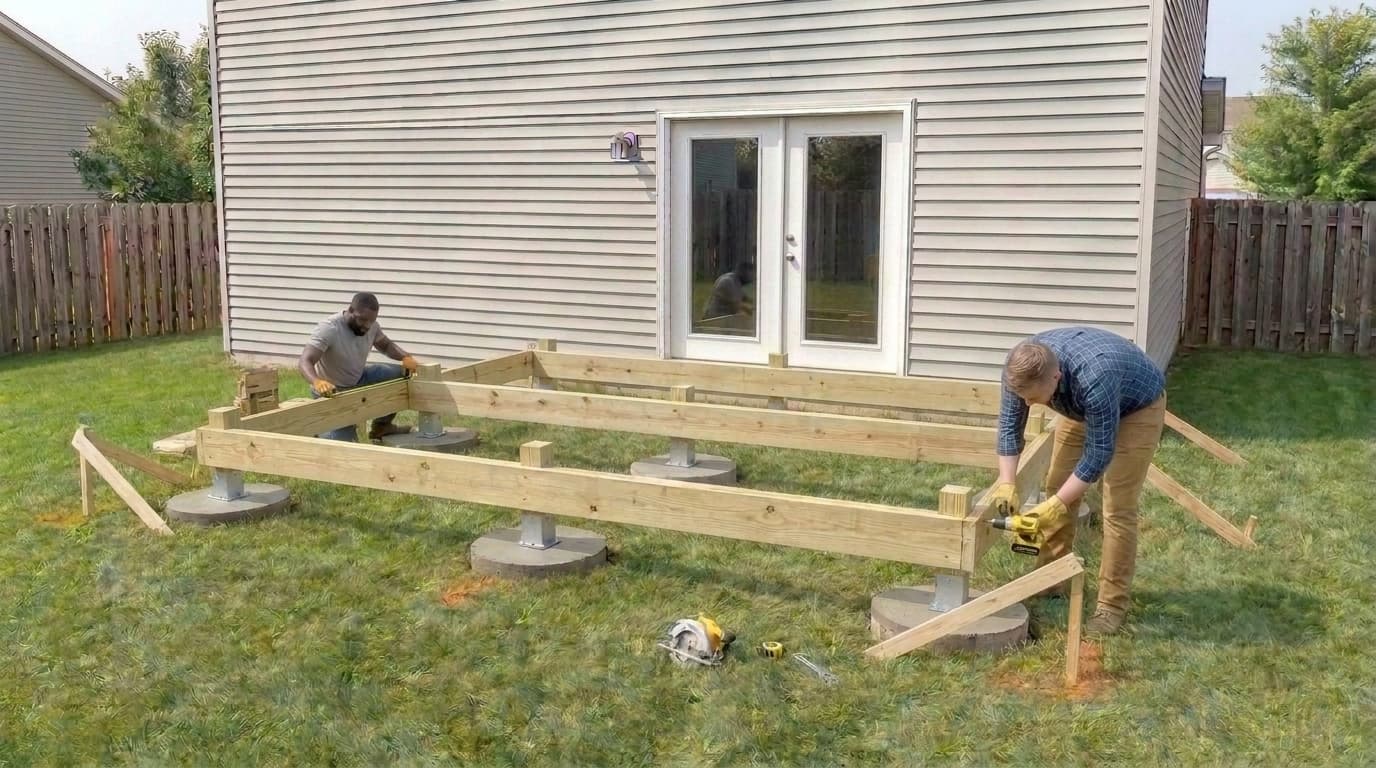
12 × 16 ft
WHAT TO DO
Using the independent beam/post support system already installed, build the rim/end framing at the established elevations and square the complete structural perimeter. Keep the house-side frame structurally independent of the house with the clearance required by the approved design, and temporarily brace the frame until the joists make the assembly stable.
FOR YOUR DECK
This freestanding deck uses 3 × 3 with 9; both support sides remain independent of the house. Verify the rim/end framing, clearances and structural connections against the approved design.
CHECK BEFORE CONTINUING
✓No structural ledger or unintended house attachment
✓House-side clearance matches the approved design
✓Opposing frame dimensions match
✓Frame diagonals both ≈ 20.00 ft
✓Rim/end framing connections complete
✓Frame stable and temporarily braced before joist installation
STEP 08
Install joists
BUILDVIEWSee each stage before you build it
STEP 08 / 12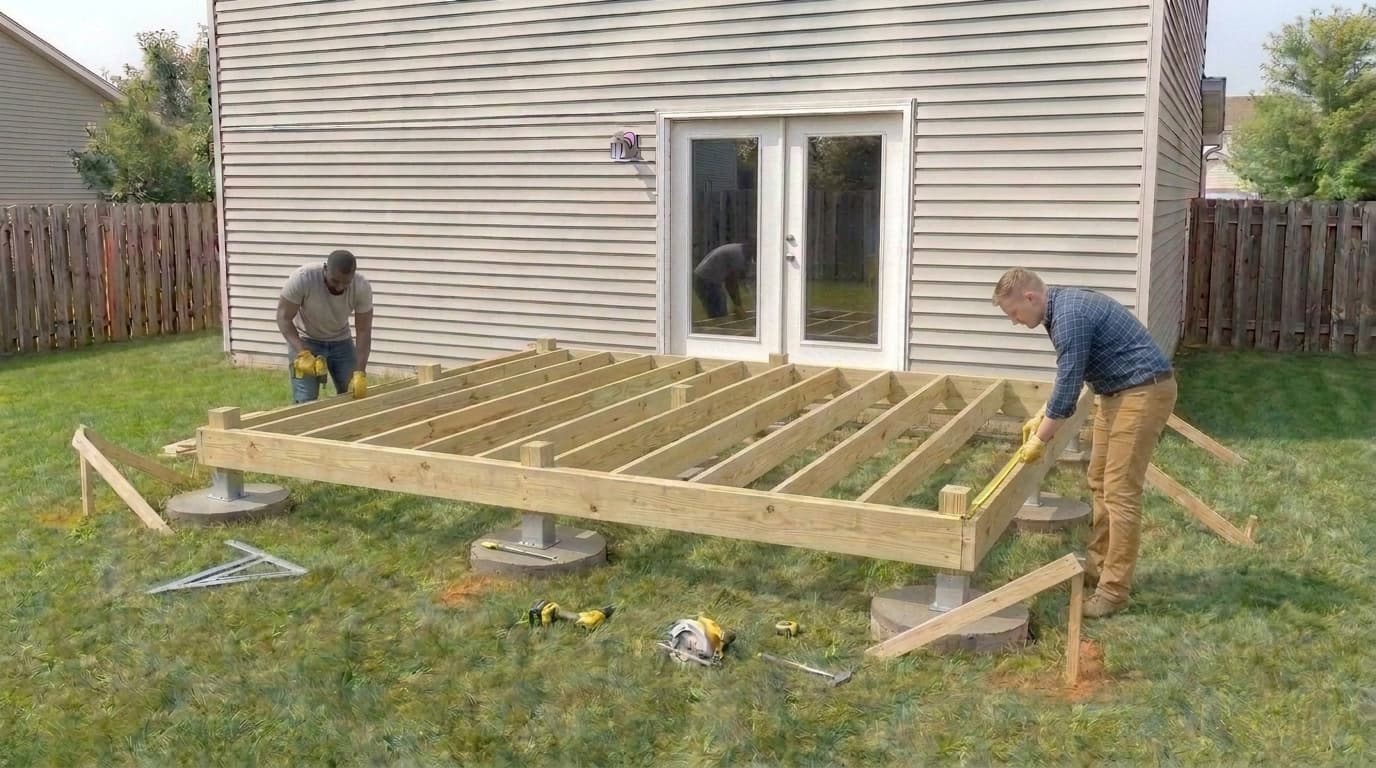
12 × 16 ft
WHAT TO DO
Start from one reference edge and mark every joist center at 16 inches on center. Do not chain measurements from joist to joist; measure each mark from the same origin, then cut, crown and fasten the joists.
FOR YOUR DECK
For your deck: install 10 at 16-in on-center spacing. Verify allowable spans for the actual lumber species, grade, size and loads.
CHECK BEFORE CONTINUING
✓10 joists accounted for
✓16-in O.C. marks measured from one reference edge
✓Joist crowns oriented consistently
✓Required hangers / connectors fully fastened
STEP 09
Install blocking & hardware
BUILDVIEWSee each stage before you build it
STEP 09 / 12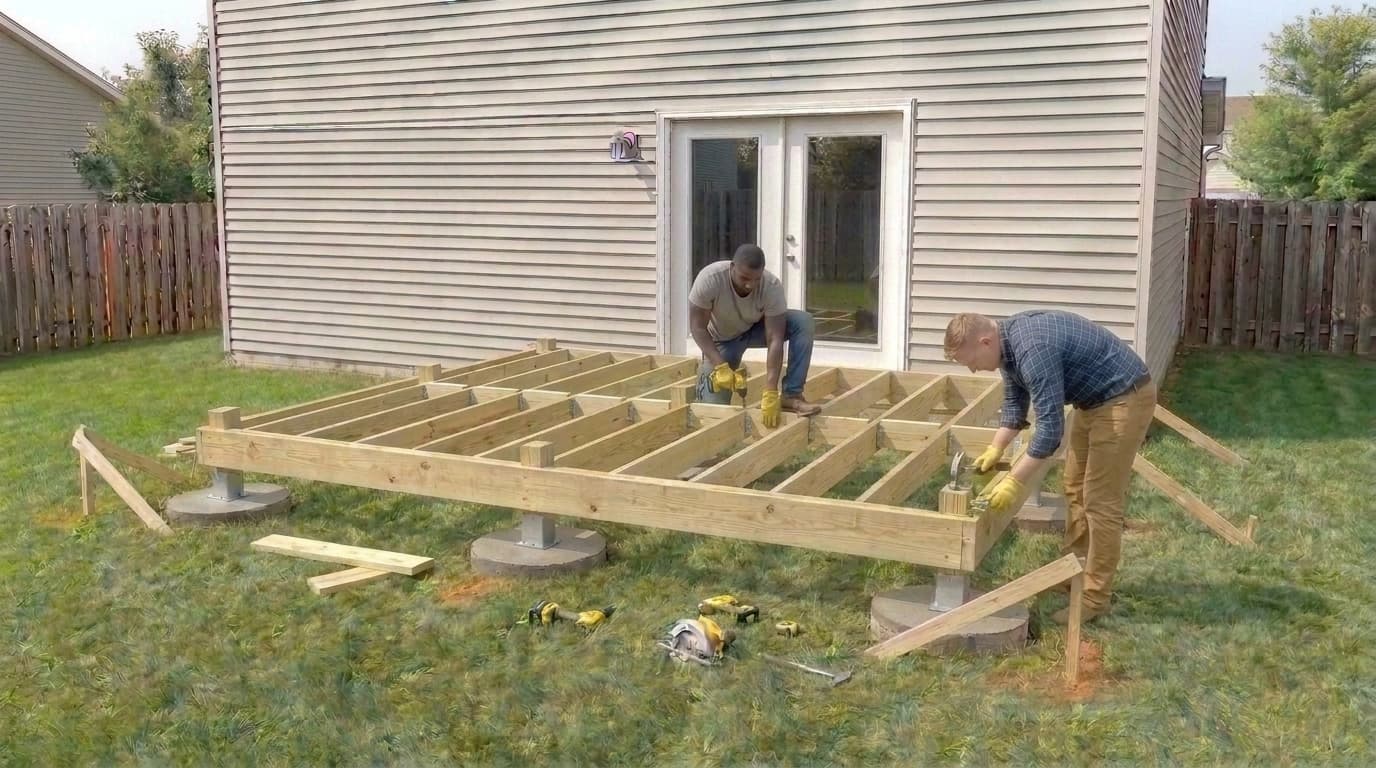
12 × 16 ft
WHAT TO DO
Install required blocking, lateral restraint and remaining framing connectors before covering the frame. If guards or stairs are required or included in the approved design, install their structural blocking, post/load-path connections and other concealed reinforcement now while the framing is accessible. Recheck fastener schedules and use corrosion-resistant fasteners compatible with the lumber and connectors.
FOR YOUR DECK
Keep the 16-in on-center joist layout while adding blocking. Guard-post reinforcement and lateral-load details depend on the verified design.
CHECK BEFORE CONTINUING
✓Blocking installed where required
✓Connector fasteners complete
✓Lateral-load connections complete where required
✓Guard / stair structural reinforcement complete before decking where applicable
✓Required framing inspection completed before concealment where applicable
✓No structural hardware left inaccessible beneath decking
STEP 10
Install decking & trim
BUILDVIEWSee each stage before you build it
STEP 10 / 12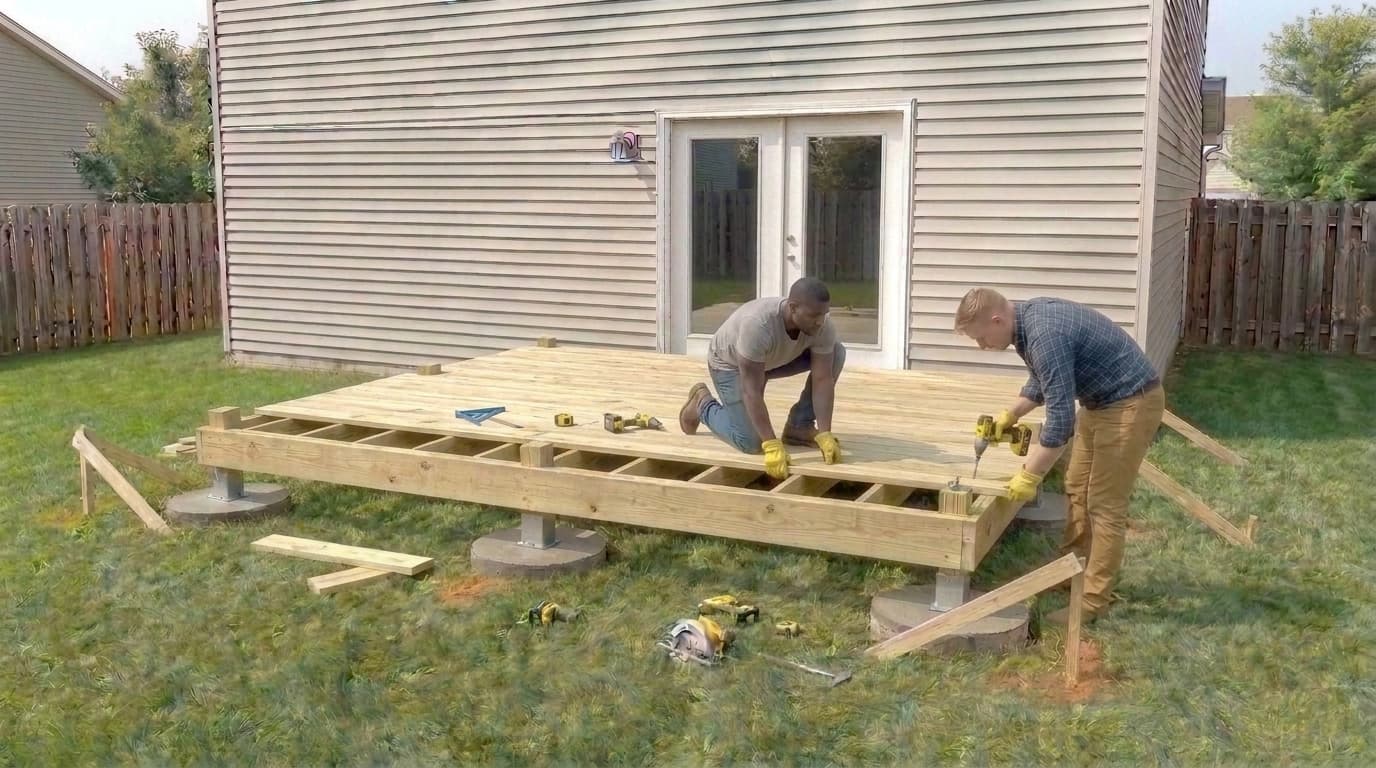
12 × 16 ft
WHAT TO DO
After required framing inspections and concealed guard/stair reinforcement are complete, start from a straight reference and install boards perpendicular to the joists. Follow the selected decking manufacturer requirements for joist spacing, gaps, fastener pattern, edge distances and allowable overhang. Check alignment every few courses. After the field boards are secure, snap a straight trim line, cut ends consistently and complete required fascia / edge details.
FOR YOUR DECK
Install your pressure-treated wood decking. Purchase plan: 463 linear ft (29). Surface-fastener estimate: 771. The calculation uses 16-ft purchase boards and 10% waste.
CHECK BEFORE CONTINUING
✓First board / reference line straight
✓Manufacturer joist-span and gap requirements followed
✓Fastener pattern and edge distances followed
✓Alignment checked throughout installation
✓Trim line straight
✓Board ends supported and overhang within product limits
✓Fascia / edge details complete
✓No protruding fasteners
STEP 11
Complete guards & stairs
BUILDVIEWSee each stage before you build it
STEP 11 / 12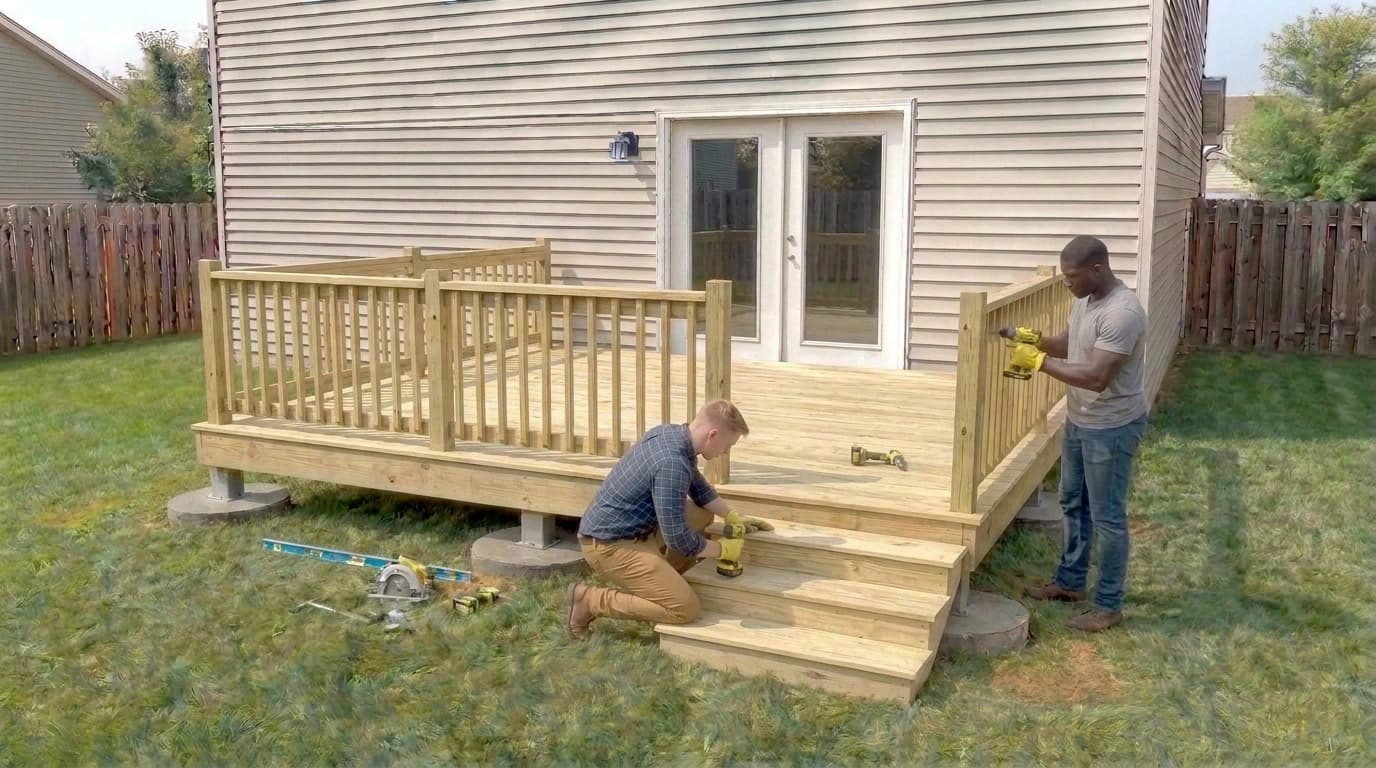
12 × 16 ft
WHAT TO DO
Complete every required guard, handrail and stair assembly using the structural blocking, posts and load-path connections prepared before decking. Verify stair geometry, landings, guard/handrail details and openings against the approved design and local requirements.
FOR YOUR DECK
Guards, stairs, handrails and elevated-deck details are safety-critical and must match the approved design and locally applicable requirements before use.
CHECK BEFORE CONTINUING
✓Required guards complete and securely connected
✓Required stairs / landings / handrails complete
✓Stair opening and walking path clear
✓All structural guard / stair connections complete
STEP 12
Final inspection
BUILDVIEWSee each stage before you build it
STEP 12 / 12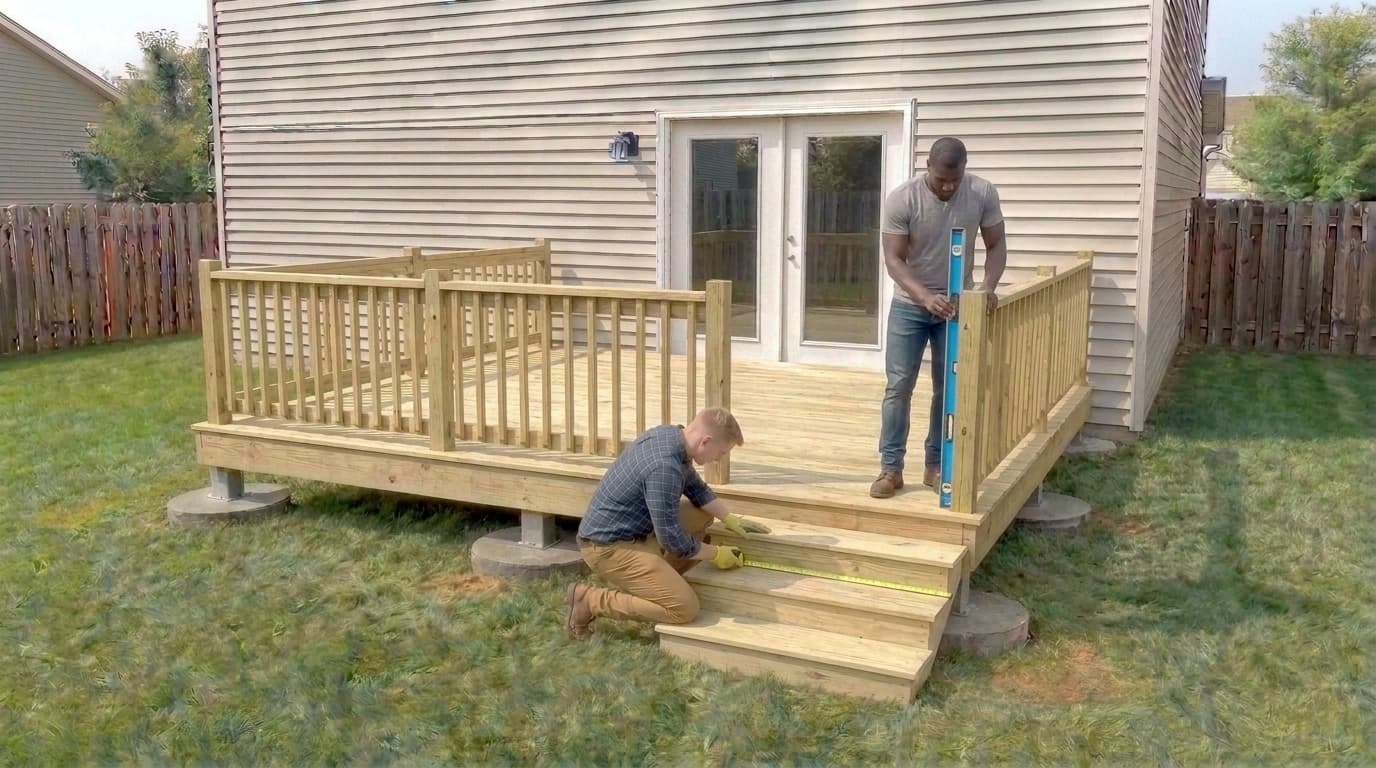
12 × 16 ft
WHAT TO DO
With construction complete, inspect accessible structural connections, guards, stairs, handrails, fasteners, board spacing and finished edges. Correct defects, clean the site, complete any required finish or preservative work, and obtain the required local final inspection before normal use.
FOR YOUR DECK
The deck should be construction-complete before this checkpoint. Do not use it until required safety features, inspections and product-specific conditions are satisfied.
CHECK BEFORE CONTINUING
✓Guards, stairs and handrails checked for secure connections
✓Accessible structural connections inspected
✓Walking surface and finished edges checked
✓Required local final inspection complete
✓Manufacturer finish requirements completed
FINISHED PROJECT
See where you're headed
This is the completed-project reference. After you finish the build, open the deck for normal use only after required inspections, finishes and product-specific conditions are satisfied.
12 × 16 ft finished deck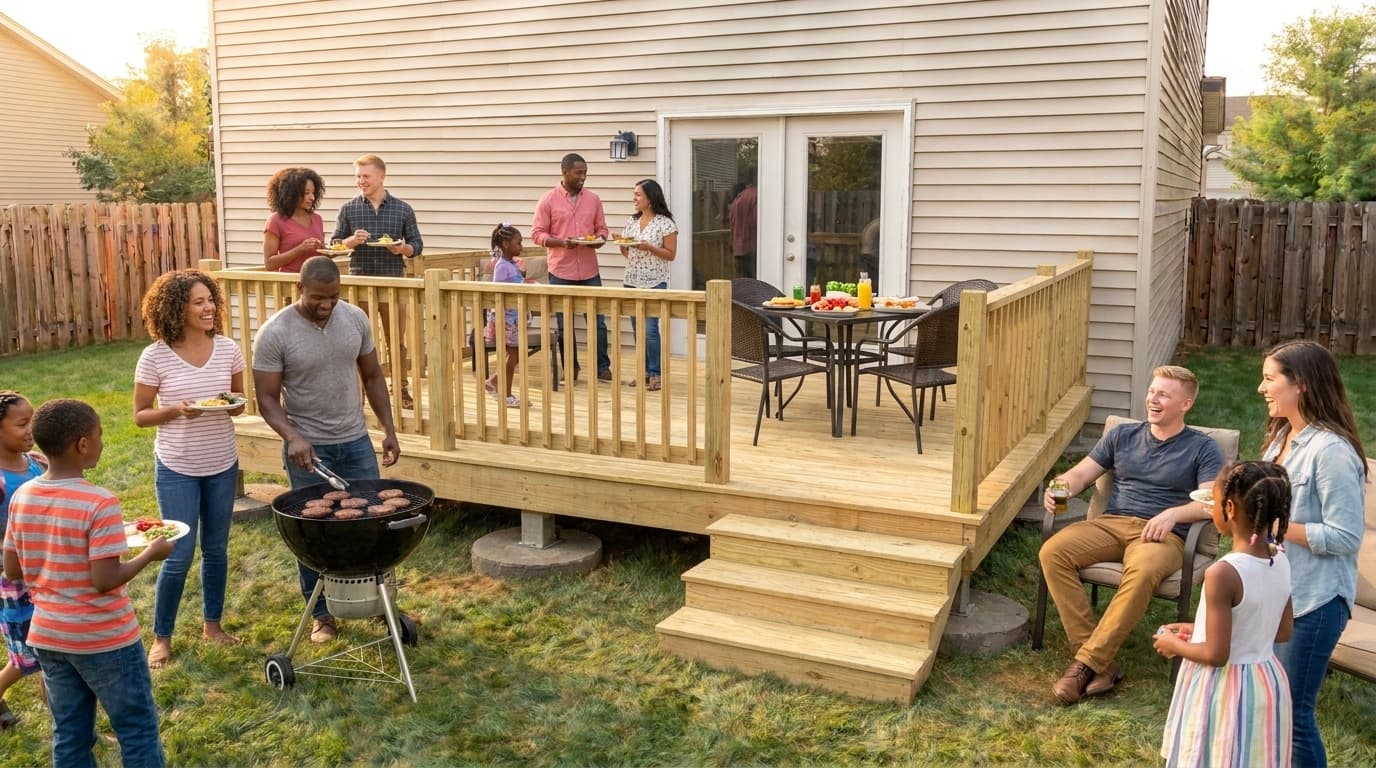
BEFORE
AFTER
Your calculated project: 12 × 16 ft · Freestanding · pressure-treated wood · 10 · 9
PlanDIYBuild connects the common start-to-finish deck-building sequence to the quantities and choices from your calculation. Always follow the approved project design, local requirements and product manufacturer instructions when they differ.
What this estimate covers
From deck size to a purchase plan
The live estimate converts the 192 sq ft starting footprint into board rows and decking to buy, joist quantities, surface fasteners, a preliminary footing layout and concrete quantities. The project takeoff below the calculator carries recognized materials into the cost estimate and shopping workflow.
12×16 deck assumptions
The page begins with BuildGauge's practical deck defaults, including board width and gap, joist spacing, maximum footing spacing, footing dimensions and a decking waste allowance. Open Customize project details in the calculator to change them.
Material quantities are planning estimates rather than a stamped structural plan. Verify spans, beams, posts, connections, loads, soil conditions, frost depth and local requirements before purchasing or building.
12×16 deck FAQ
How many square feet is a 12×16 deck?
A 12×16 rectangular deck has 192 square feet of finished surface area.
Can I change the 12×16 dimensions?
Yes. This planner starts at 12 by 16 feet, but you can change either dimension and the material quantities, visualization and cost estimate update with the project.
Does this page provide structural design?
No. The footing grid and framing quantities are planning estimates. Beam and joist spans, loads, ledger connections, footing requirements and other structural details must be verified for the actual design and local requirements.
Different deck size?
Keep the same planning workflow
Change the dimensions directly above for a custom project, or use the Deck Planning Hub for specialized deck-board, joist, screw and footing tools.
Project shopping
Useful products for this project
Photos are representative examples of the item type—not the exact Amazon listing. Amazon links open current search results so you can compare brands, sizes and prices.
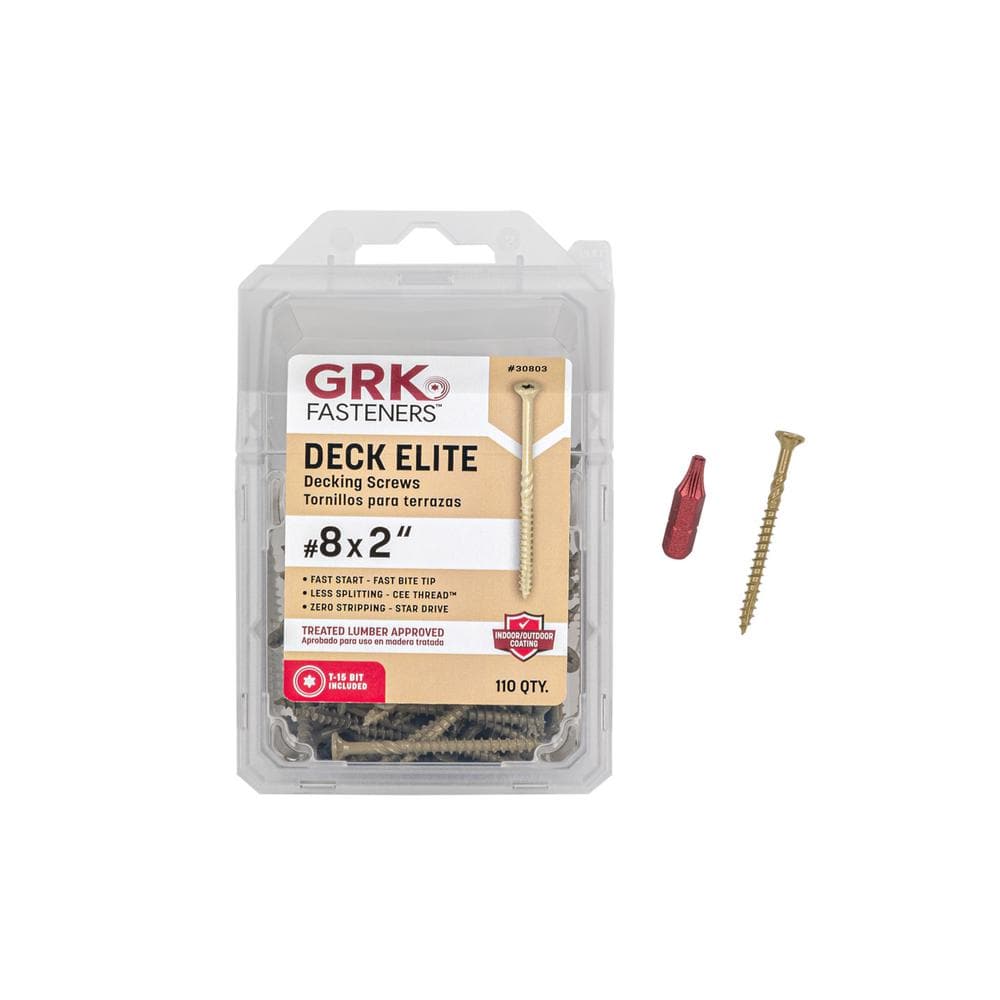 Representative product photo
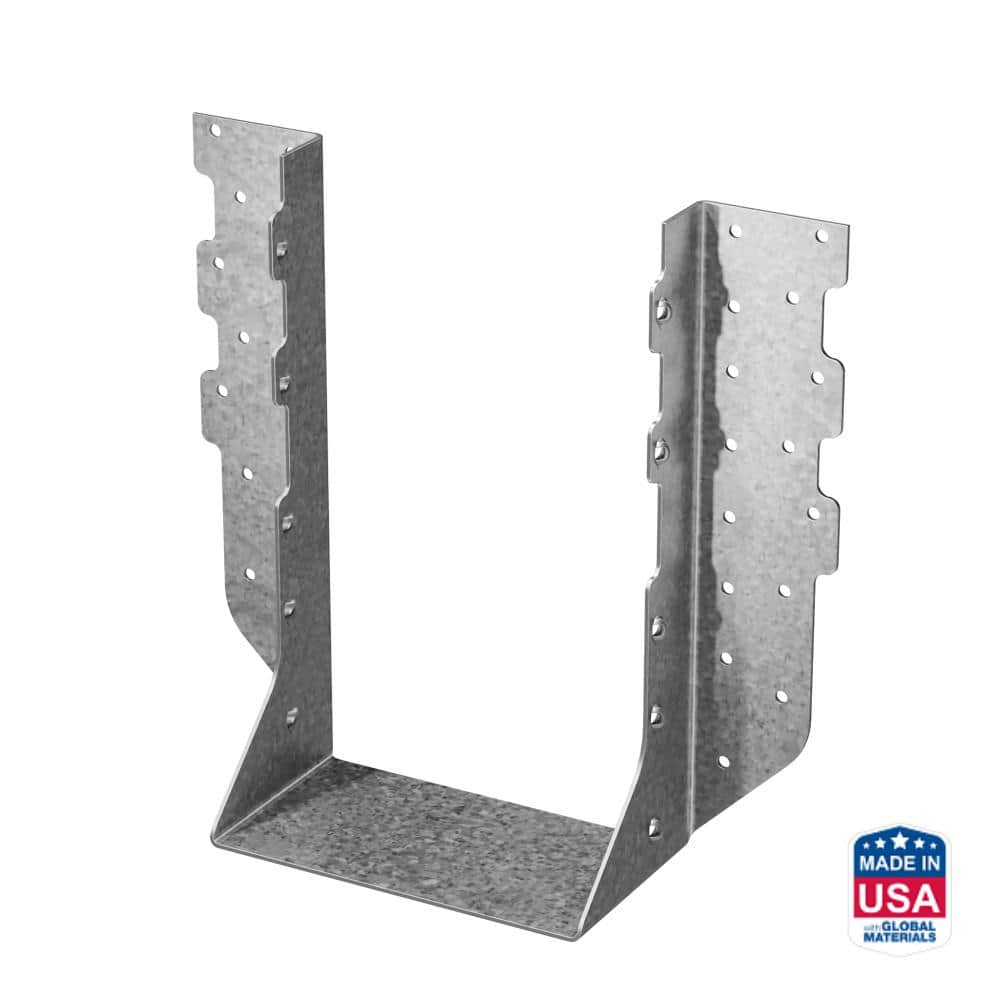 Representative product photo
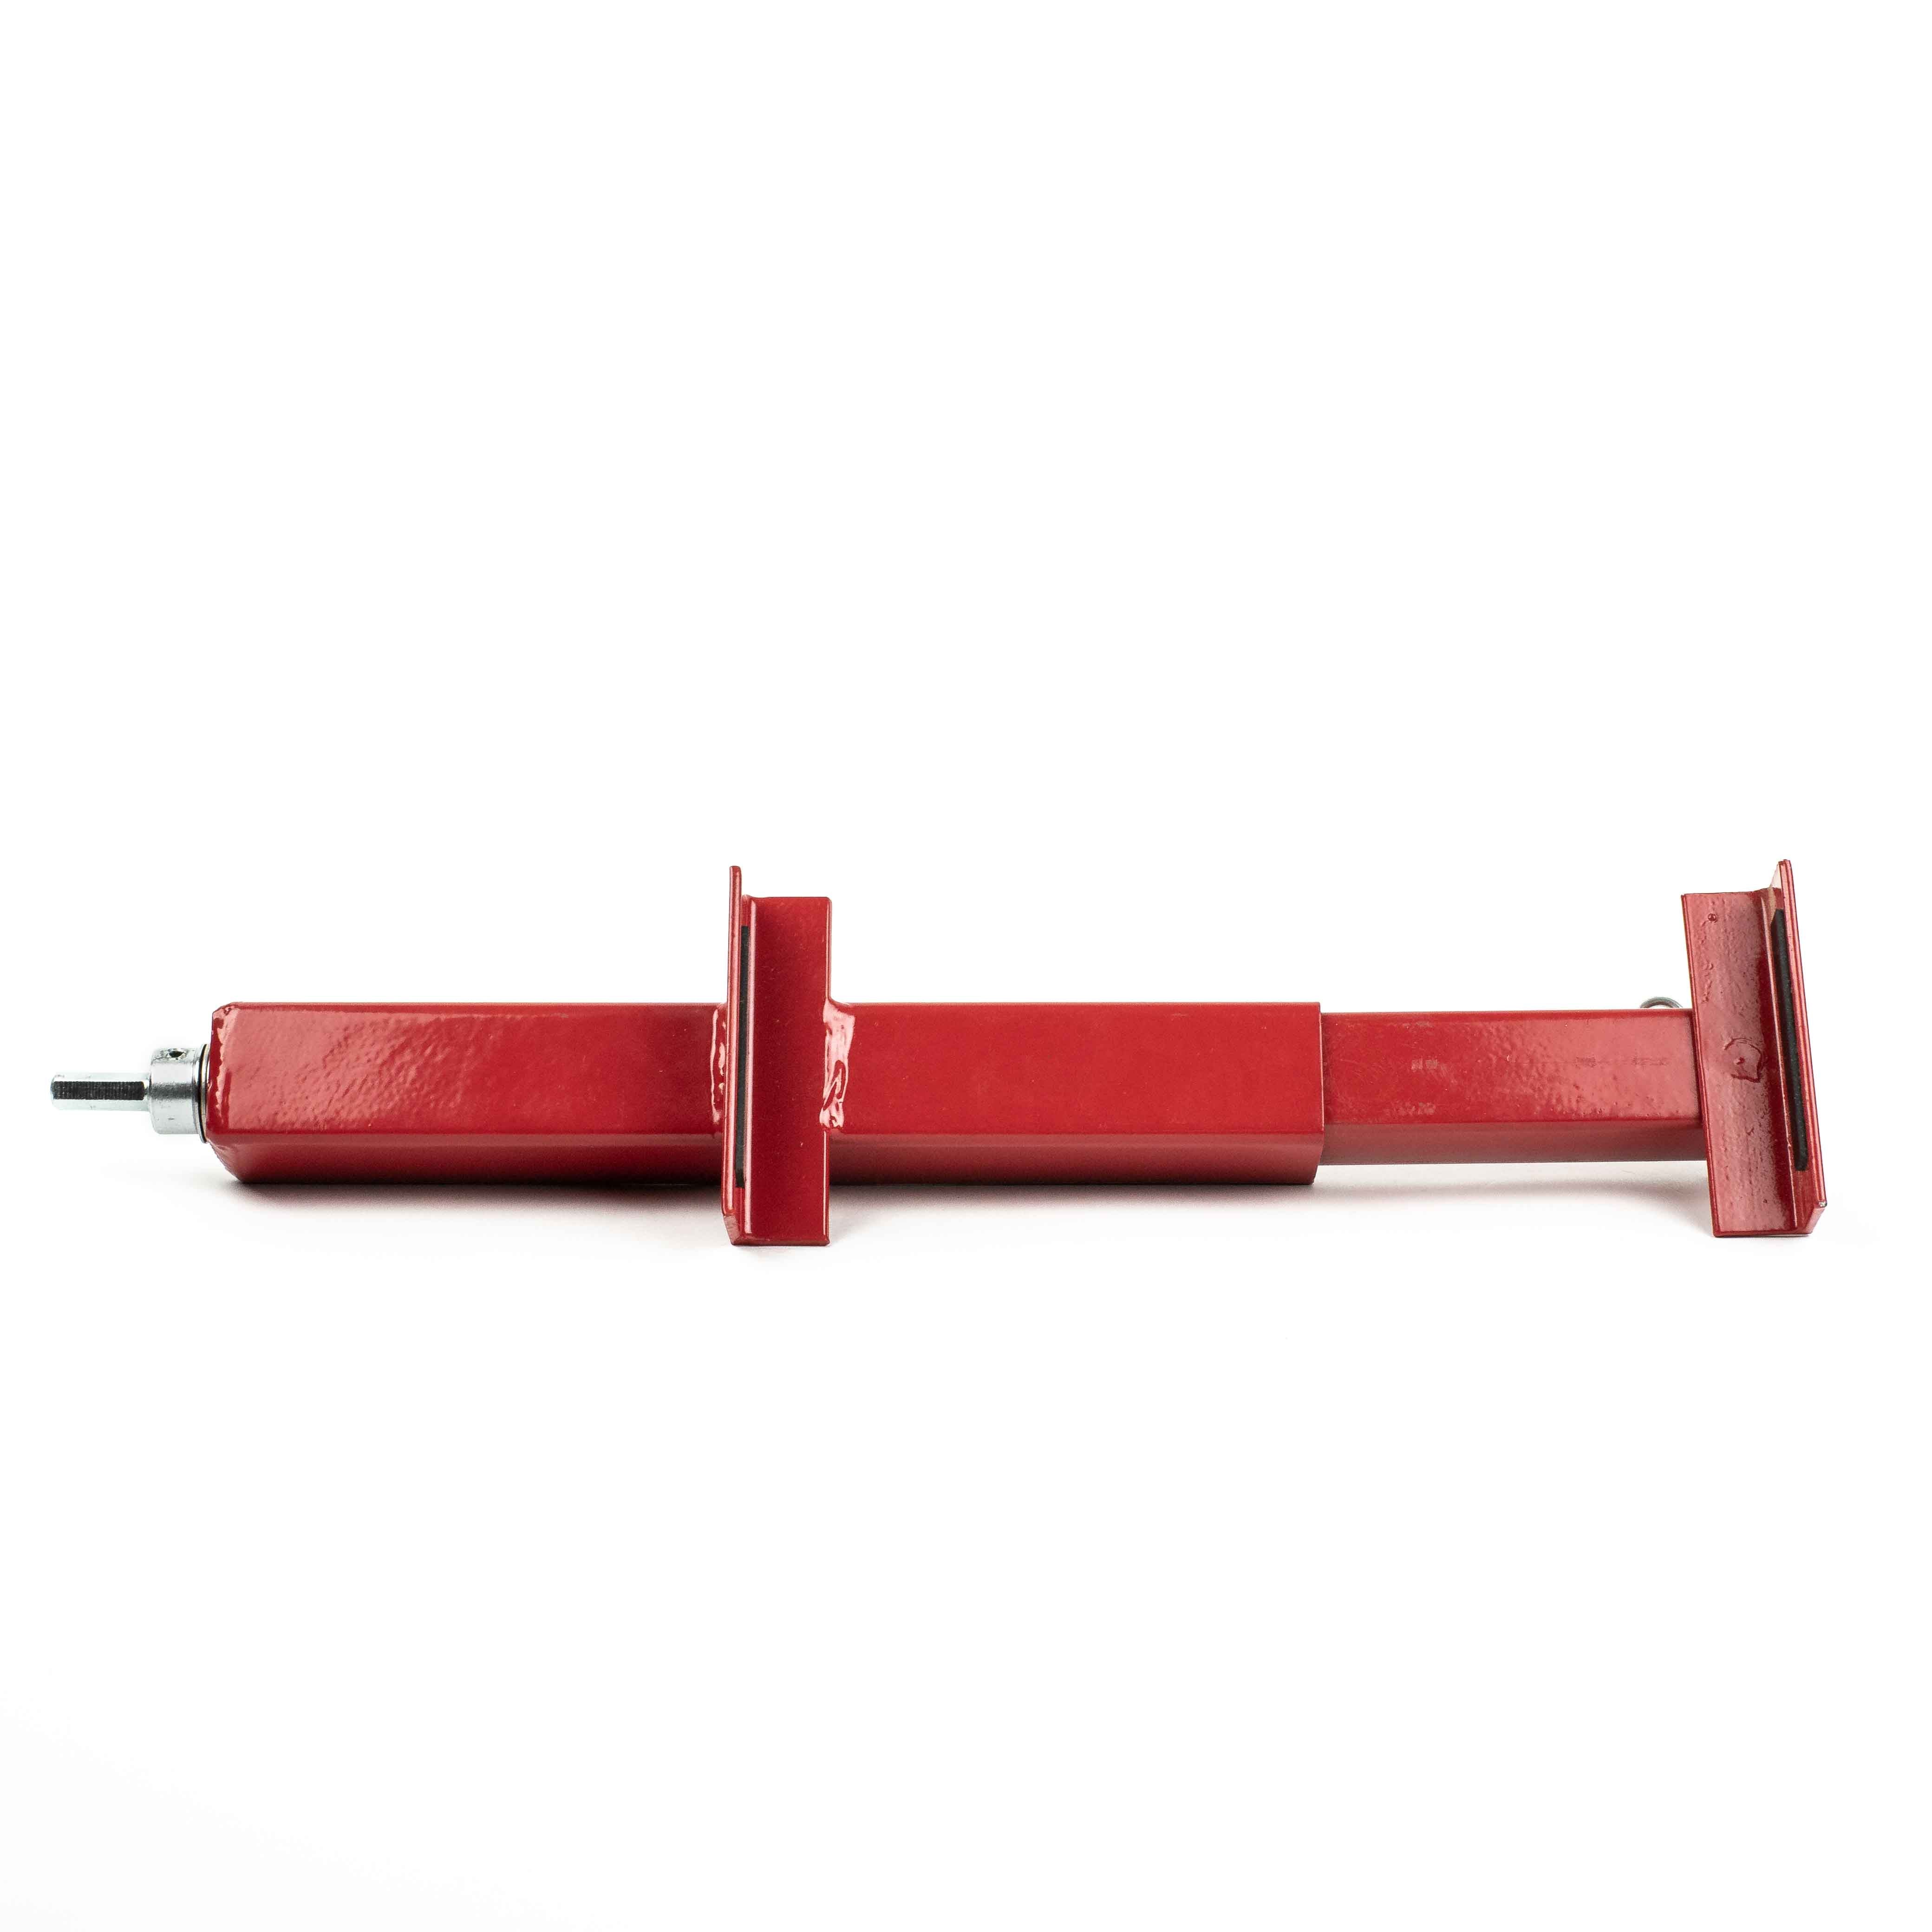 Representative product photo
LOOKING FOR SOMETHING ELSE?
Search opens Amazon results in a new tab. PlanDIYBuild adds “for deck project” to help narrow the results.Find something for this project
Tell PlanDIYBuild what you need. We’ll add project context so the search stays relevant.
Independent recommendationsPlanDIYBuild does not rank products by commission, and calculator results do not change based on affiliate relationships.As an Amazon Associate, PlanDIYBuild earns from qualifying purchases. Verify product dimensions, compatibility, coverage and manufacturer instructions before purchasing.